Project Info
👤 Role: Lead Programmer
👥 Team Size: 1
⌛ Time Frame: 3 Weeks
🛠️ Framework: Unity
🔥 Stylized Fire 🔥
Common methods of producing Fire VFX in Unity, is to use a Particle System or VFX Graph, however the many transparent quads used for each particle can create unnecessary overdraw which negatively affects performance, especially for mobile platforms.
Usually when rendering Opaque geometry, Unity renders objects front-to-back, allowing z-testing to take place; objects obscured by closer objects have their fragments discarded from being rendered, avoiding unnecessary calculations. However when rendering Transparent geometry, Unity has to render those objects back-to-front instead, in order to achieve the correct alpha blending between transparent objects. If a scene contains many of these particles systems the transparency queue can get filled very quickly, resulting in an overcomplex scene that eats away a large portion of the overall graphics budget.
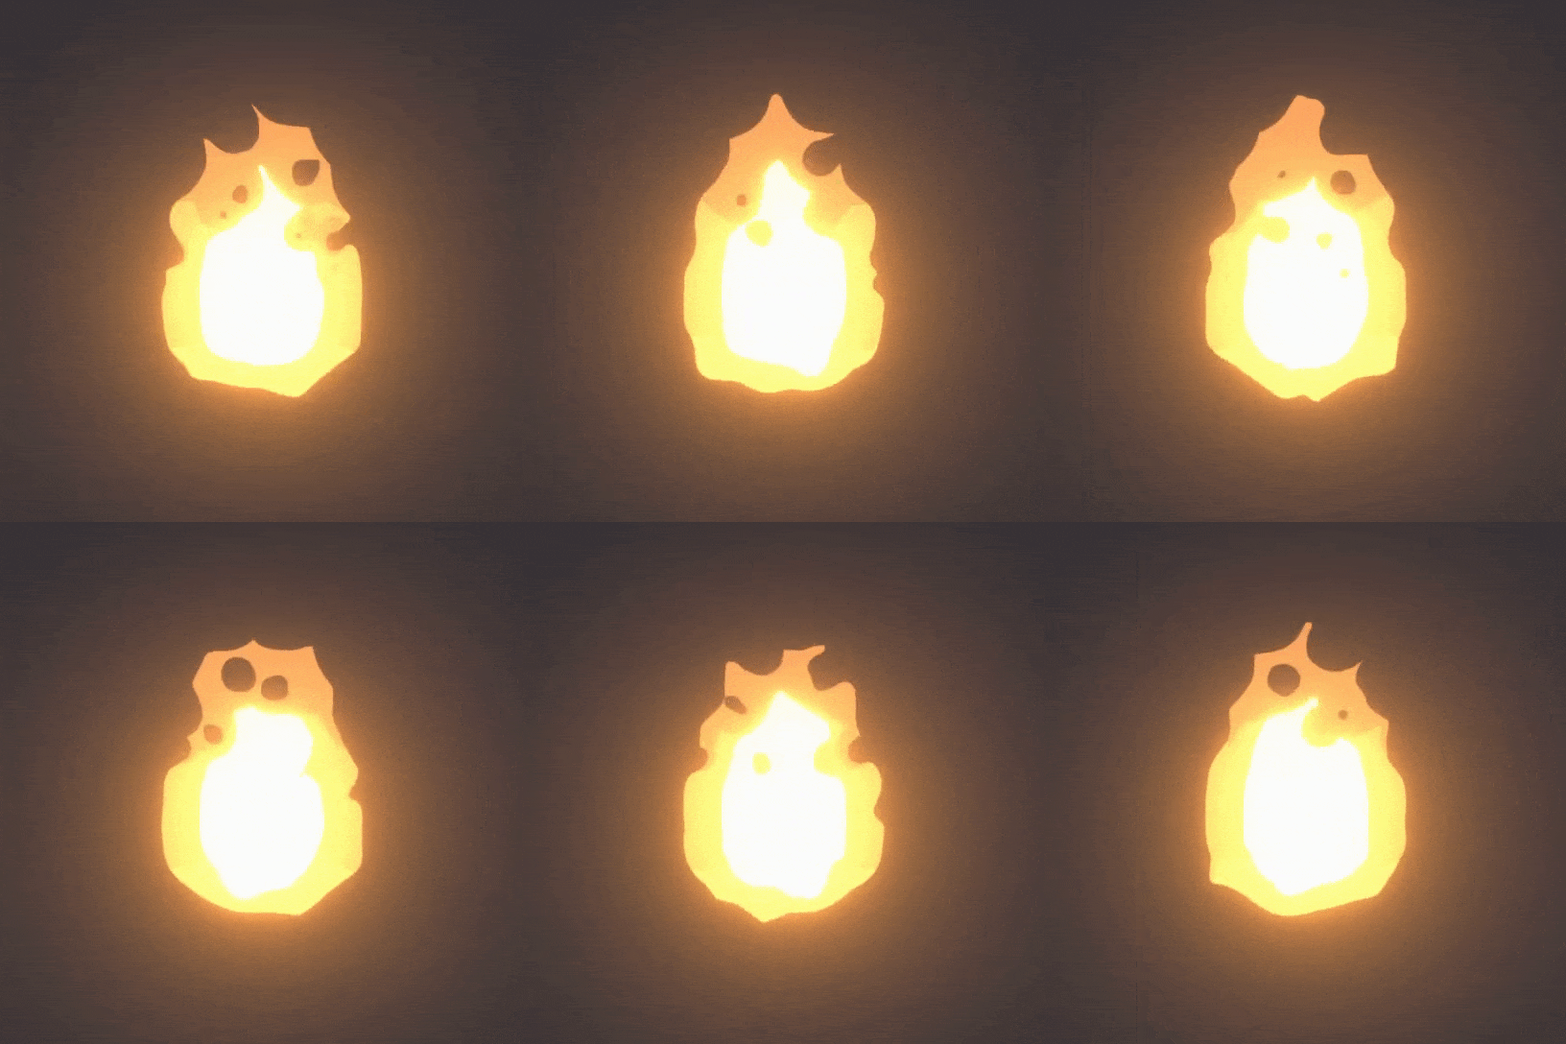
A different technique that mitigates this issue is to offset a single quad’s UVs, using noise, to create a fire effect. This reduces the amount of transparent objects per Fire VFX to one, meaning many of these fires can run in parallel on the GPU, and also take less calulations than the particle system. I first saw this technique at an Unreal Engine talk about RiME Stylized VFX. Based on this talk I’ve made multiple versions of a fire shader to try replicate the benefits and test my skills with the Unity Shadergraph.
Procedural
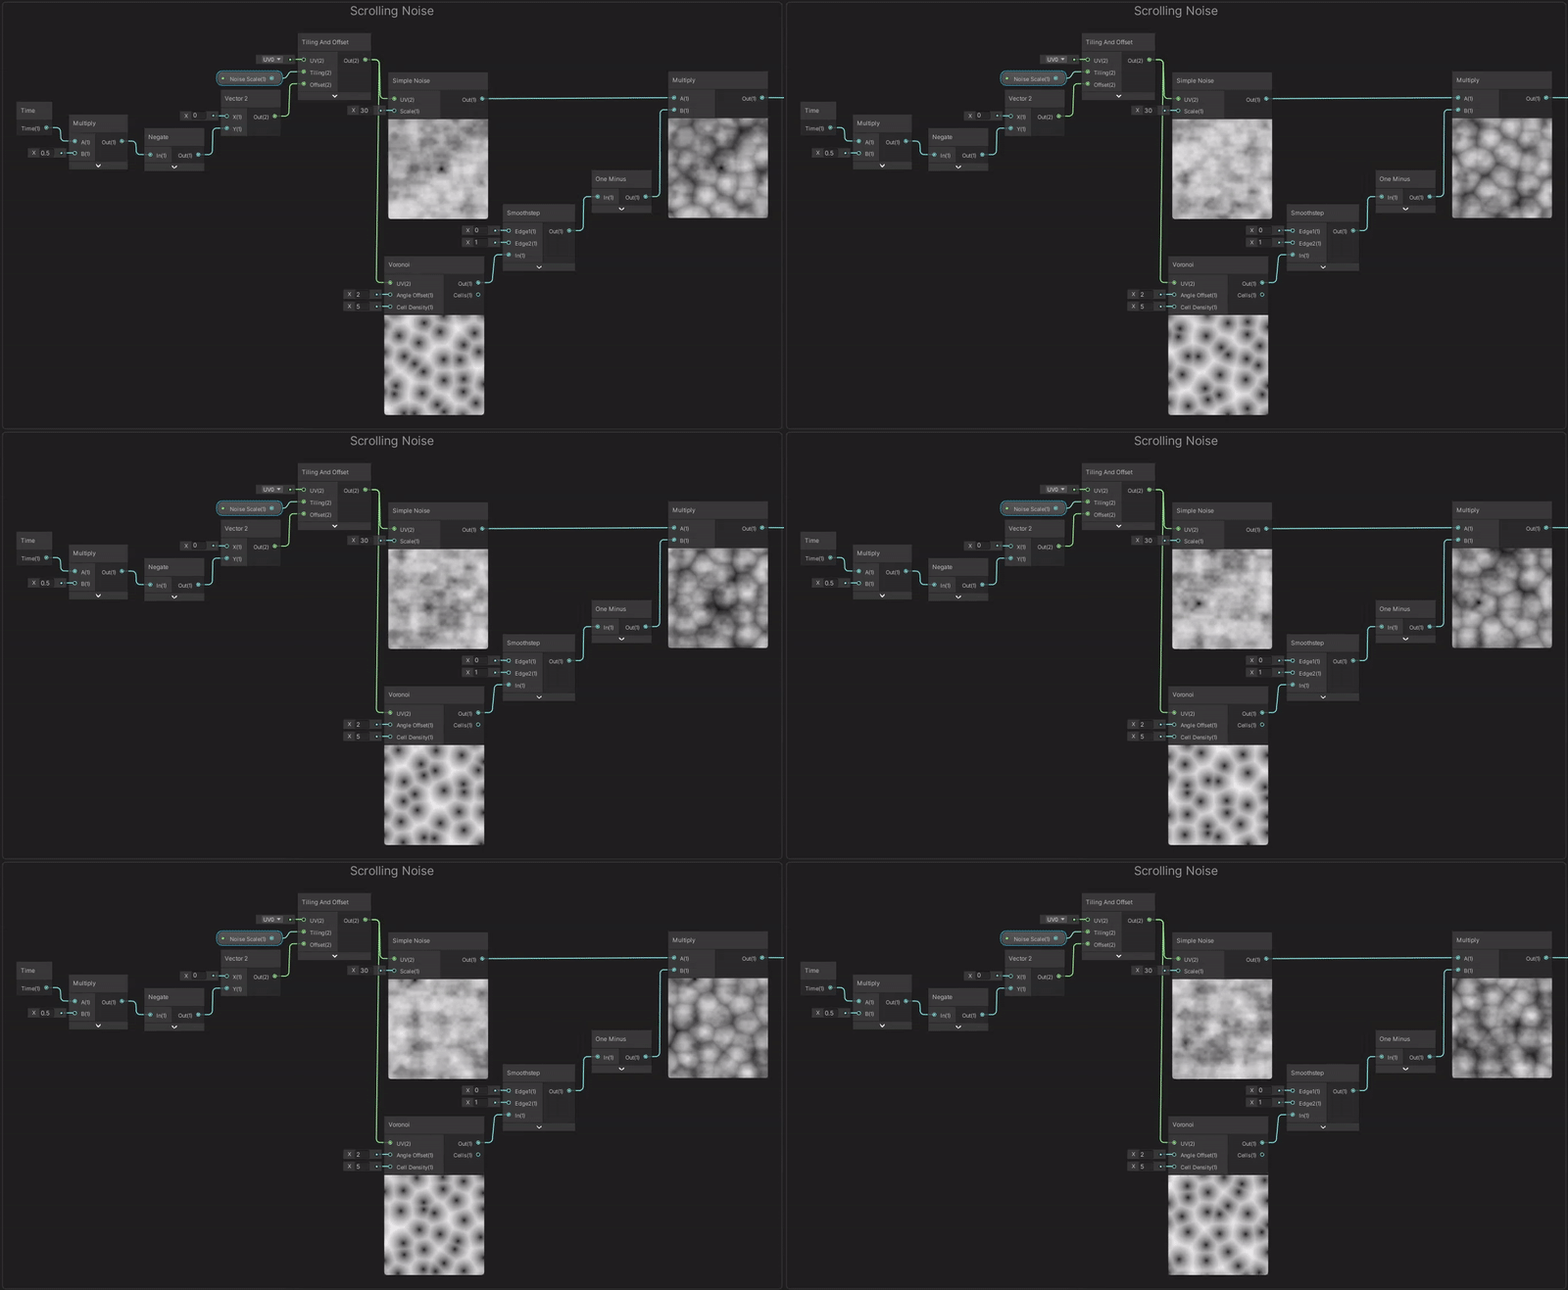
To generate the required motion for the Fire Effect, I utilized the Time value and enhanced its impact through multiplication with a floating-point number. I reversed this value to make the texture scroll upwards as by default, the Time output causes downward scrolling. This value is then employed as the Y component of a Vector2 (keeping the X component at 0) and used as the offset in the Tiling And Offset Node. To adjust the scale of the tiling, a Vector2 Property is used, allowing alteration of the noise scale in the Inspector. The scrolling UVs from the Tiling And Offset are then applied as the UV input for a Simple Noise Node and Voronoi Node.

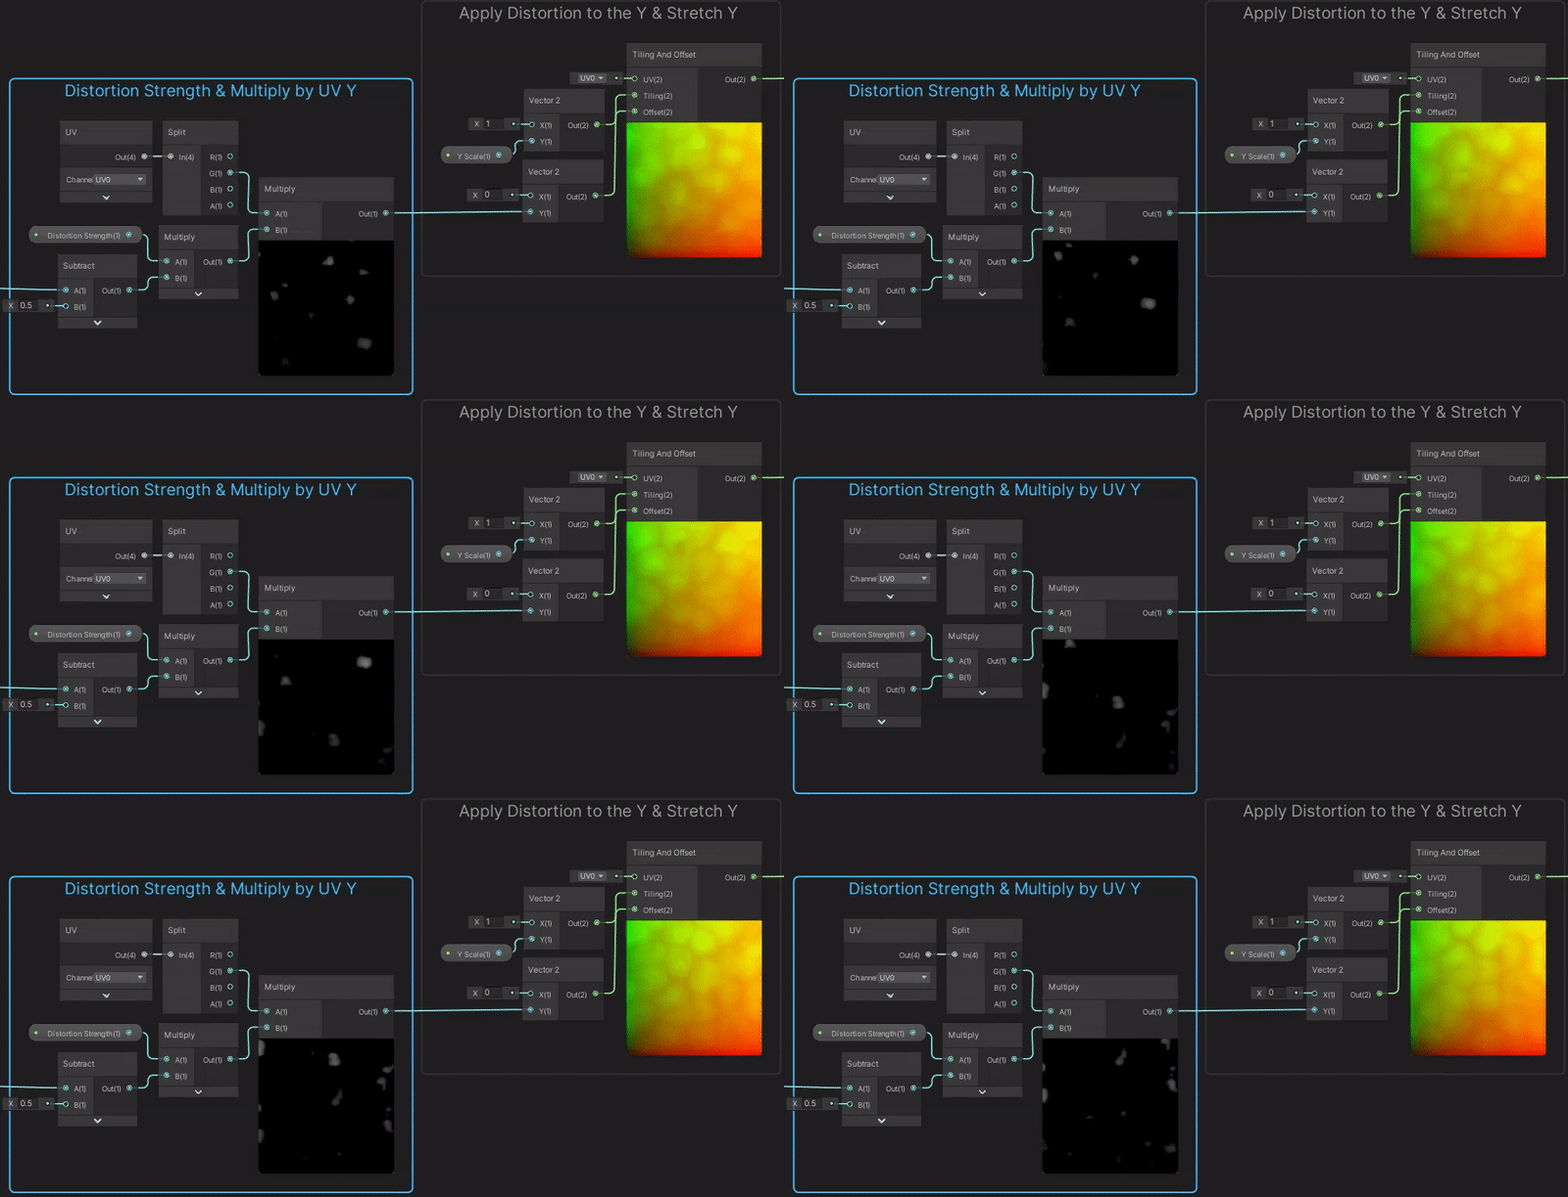
This noise will later serve to offset the UVs, creating fire-like motion. Instead of constant or time-based offset (which, while varying, is equal for all UV coordinates), we shift each UV coordinate differently, resulting in a warping effect. To center the distortion, we subtract 0.5, preventing unequal offset in any direction.
We then multiply this with a Vector1 property called Distortion Strength. To achieve greater distortion at the top of the fire compared to the bottom, we also multiply it with the Y-axis of the UV (G output from Split). The result is fed into the Y axis of a Vector2 and then to the Offset input on a Tiling And Offset node to apply our distortion in the vertical direction only.
Given the distortion, our UVs might exceed the 0-1 range, potentially leading to sections of the texture/ellipse being clipped due to the quad’s size. To rectify this, we introduce a Vector1 property, Y Scale, and assign it to the Y of a Vector2 (X being 1), and then to the Tiling input. This lets us scale down the effect vertically, ensuring the fire fits within the quad.

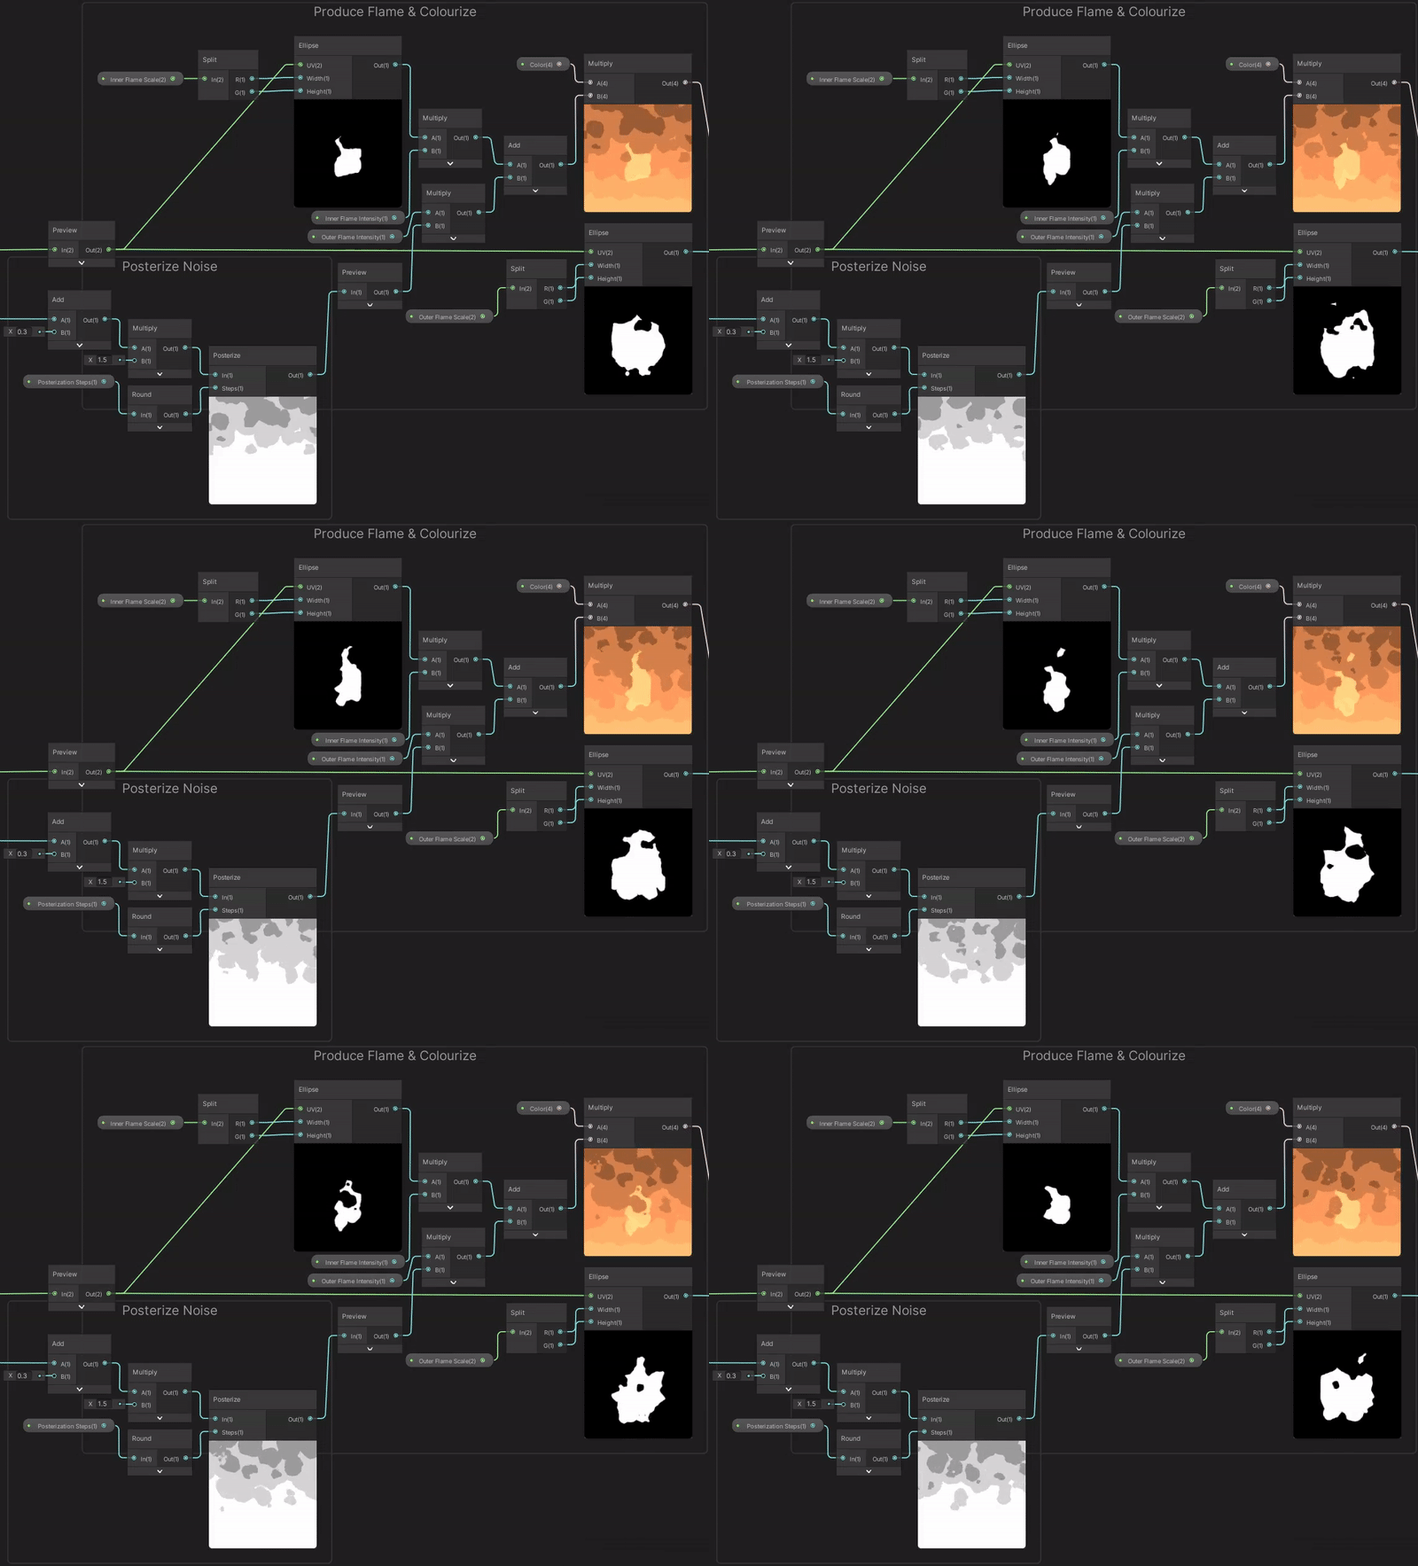
Rather than directly inputting our UVs into an Ellipse node, I decided to apply additional offset to create a more teardrop or candle-flame-like shape. I accomplished this by using the Y axis (G output from a Split), inverting it with One Minus, and processing the result in a Power node with a B value of 2. A subsequent One Minus operation flips the vertical component back, but it should not make a difference given the ellipse’s symmetry and centeredness.

Once we modify the UVs, we feed them into two Ellipse nodes, the first with a width of 0.7 and height of 0.5, and the second with both dimensions being 1.
We also process the output from the Power in the previous step by adding 0.3, multiplying by 1.5, and passing the result into a Posterize node with 3 steps. These values were mostly arrived at through experimentation to ensure the fire exhibits attractive colored bands for a more stylized appearance.
This output is combined with the smaller Ellipse output. We then colorize the fire by multiplying with a Color property (set to HDR mode with an intensity of 1.5), and connect the result to the Color input on the Unlit Master node. The surface type should also be set to Transparent in the node’s settings.
For Alpha blending, the larger Ellipse serves as the Alpha input on the Master node. For Additive blending, multiply this with the existing color output and use the result as the Color input, rendering black areas transparent.

This method is an excellent demonstration of the power of Unity Shadergraph and the versatility it provides to the developers in terms of creativity and optimization. This was an excellent learning opportunity for me to get more experience using the Unity Shadergraph and to learn more about what goes into making different effects. It is fascinating to me how with a few basic elements, combined in unique ways, you can achieve all sorts of visual outcomes. The applications of this method extend beyond just fire, and with some adjustments, it can be used for creating various other effects as well, thereby becoming a valuable tool in my VFX toolkit.
